How to create and connect a wallet
What is Metamask, how to Set up a Wallet, get a BSC-BEP20 Wallet address, and connect it to the 8.Finance platform
What is Metamask? Why do you need it?
Metamask is a Wallet for storing digital assets with the ability to connect to more than 3,700 decentralized applications and Web 3 services.
Since 2016, Metamask has become the industry standard in decentralized finance.
That is why you absolutely need it if you want to:
Play and earn in GameFi
Store and exchange crypto assets
Create passive income in DeFi
Buy and sell goods in metaverses
How to Install a Metamask Wallet
Go to the official website, metamask.io. Metamask offers several types of installations:
As a browser extension (supported by Chrome, Firefox, Edge, and Brave).
As an application for Android and Apple smartphones
Let us look at how to install Metamask as an app for the Chrome browser; this is the most popular option. The installation of a phone app has its own peculiarities, but the process is generally similar.
Start point. Go to the Chrome app store, and find Metamask there, click «Add to Chrome».

Then you need to allow Metamask to use the data it needs to work. This completes the installation of the extension (we recommend that you pin Metamask in the extension settings, so that the icon is at the extensions panel).
Now you need to register. After installing the extension, the initialization window should open in the browser with the “Get Started” button.
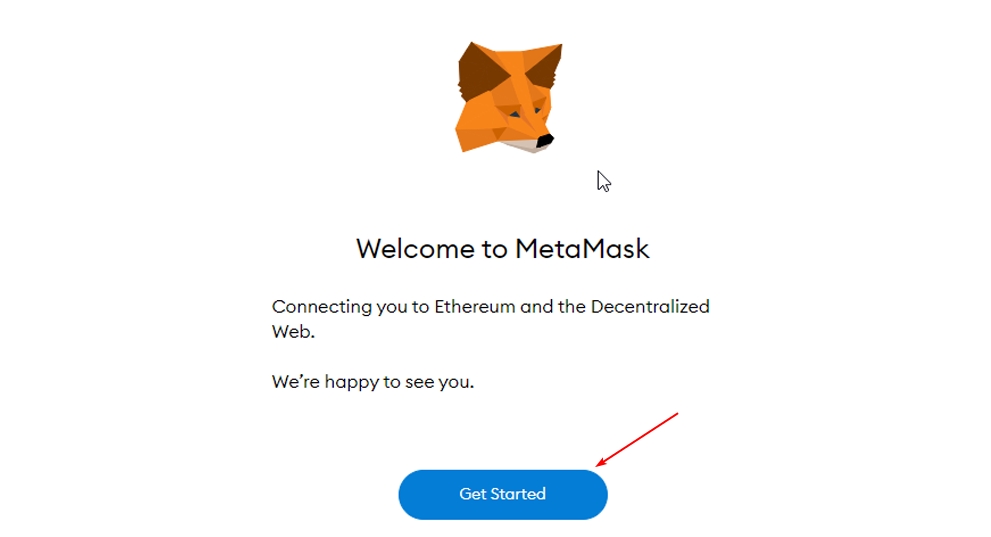
Click on it. And make a choice.

Let us say you are a newcomer and have not previously registered with Metamask. You click «Create a Wallet».
Next, you need to accept the policy of the Wallet (for example, Metamask never collects personal information and full IP addresses).
In the next step, create a password.

Despite the need to create a password, Metamask will generate and require you to write down a secret 12-word phrase. They will be the key to restoring access to the Wallet.
Treat it as responsibly as possible. Whoever has access to the secret phrase has complete power over the Wallet.
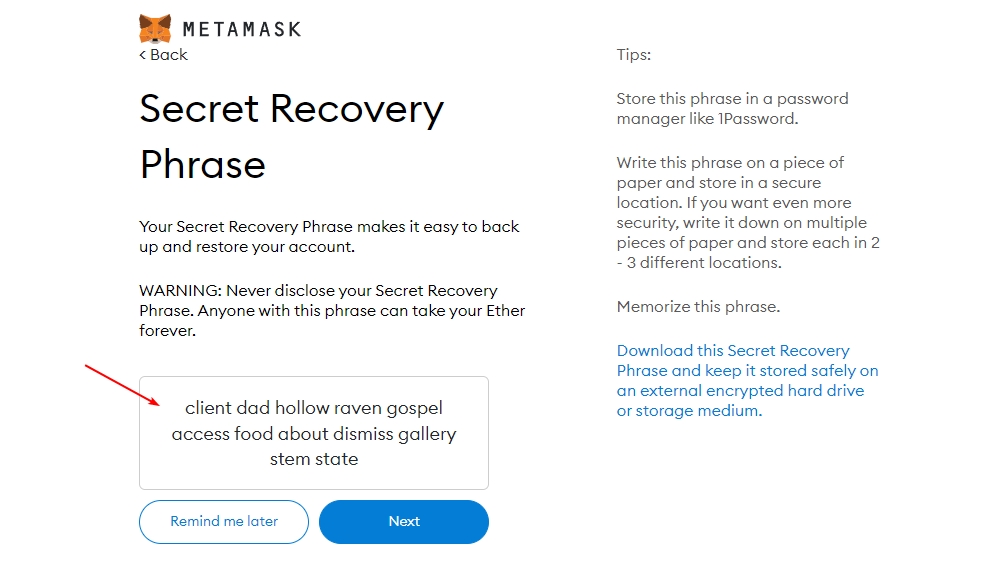
After that, the system will ask you to reproduce the 12 words in the right order to make sure you save them securely.
This completes the registration and creation of your Metamask Wallet.
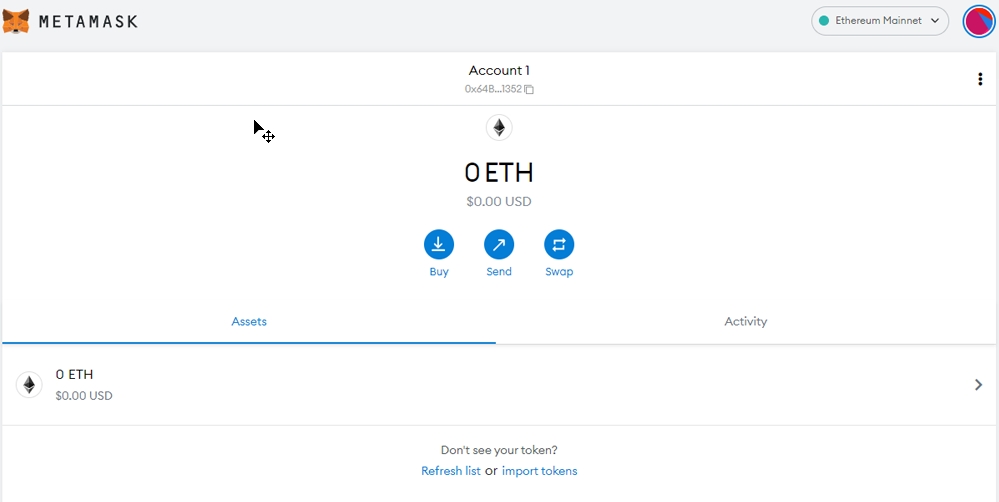
You get a unique address and a space where you can conduct basic operations with crypto assets — buy, send, and swap.
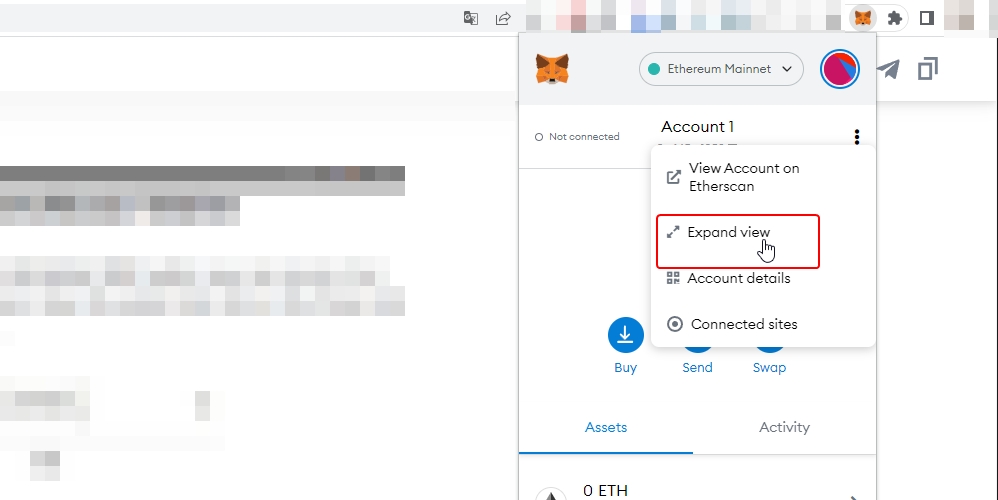
Tip. To access the Wallet, click the corresponding icon on the Chrome extensions panel. Click “Expand view” to work with the Wallet on a separate tab of the browser; it is more convenient.
How to set up a BSC network and get a BSC-BEP20 Wallet address
Even though Metamask is originally on the Ethereum blockchain, it also allows working with other blockchains—for example, BSC (Binance Smart Chain).
Let’s see how to get a BSC-BEP20 Wallet address in Metamask. To do that, you need to add a BSC network in your Wallet settings.
Follow three steps:
Enter the Wallet Settings.
Click the Networks tab.
Click «Add network».
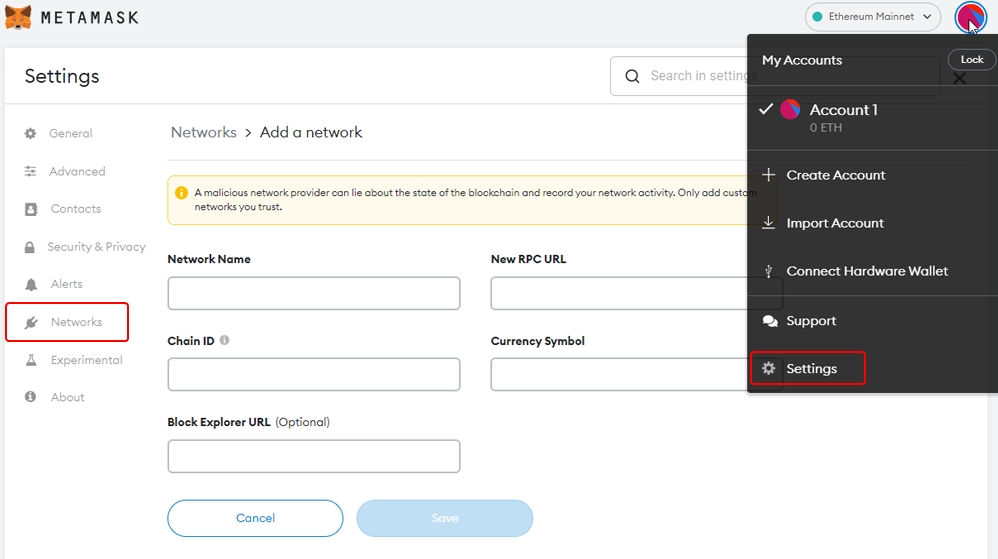
A form opens in which you must enter the following values:
Network, Name: Smart Chain
New RPC URL: https://bsc-dataseed.binance.org/
Chain ID: 56
Symbol: BNB
Block Explorer URL: https://bscscan.com

Click Save. Metamask will try to connect to the BSC.
And if you have done everything correctly, Smart Chain will appear in the list of supported Networks, and BNB will appear among the supported currencies.
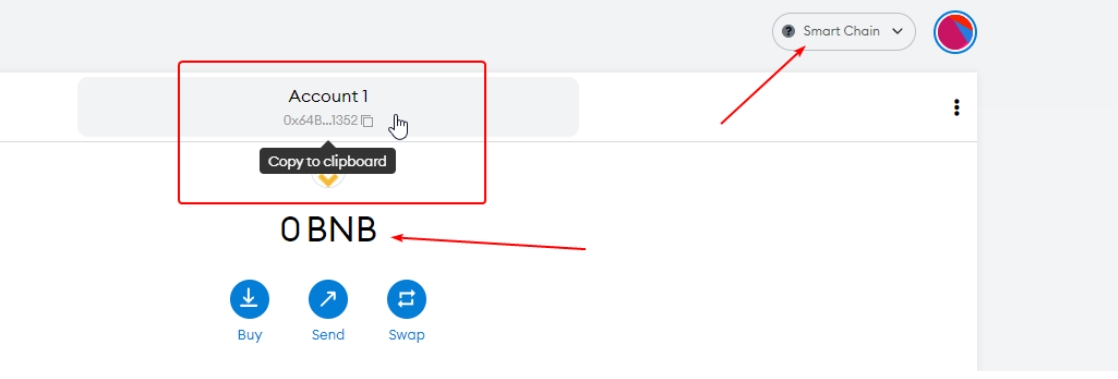
Now you can transfer cryptocurrency assets issued on the BSC blockchain to your Metamask account address. To receive the assets, copy the address and give it to the sender (e.g., an exchange or an individual).
You can transfer assets from the BSC blockchain (BEP-20) to this address. BEP-20 is the standard for tokens issued on the BSC blockchain. You can use this address to receive 8F tokens and then exchange them or transfer them.
How to Connect a Metamask Wallet to the 8.Finance platform
The 8.Finance platform works on the BSC blockchain. Establishing a connection between the Wallet and the platform is very simple. It takes a few clicks.
To do this, go to website 8.Finance and click Connect Wallet.
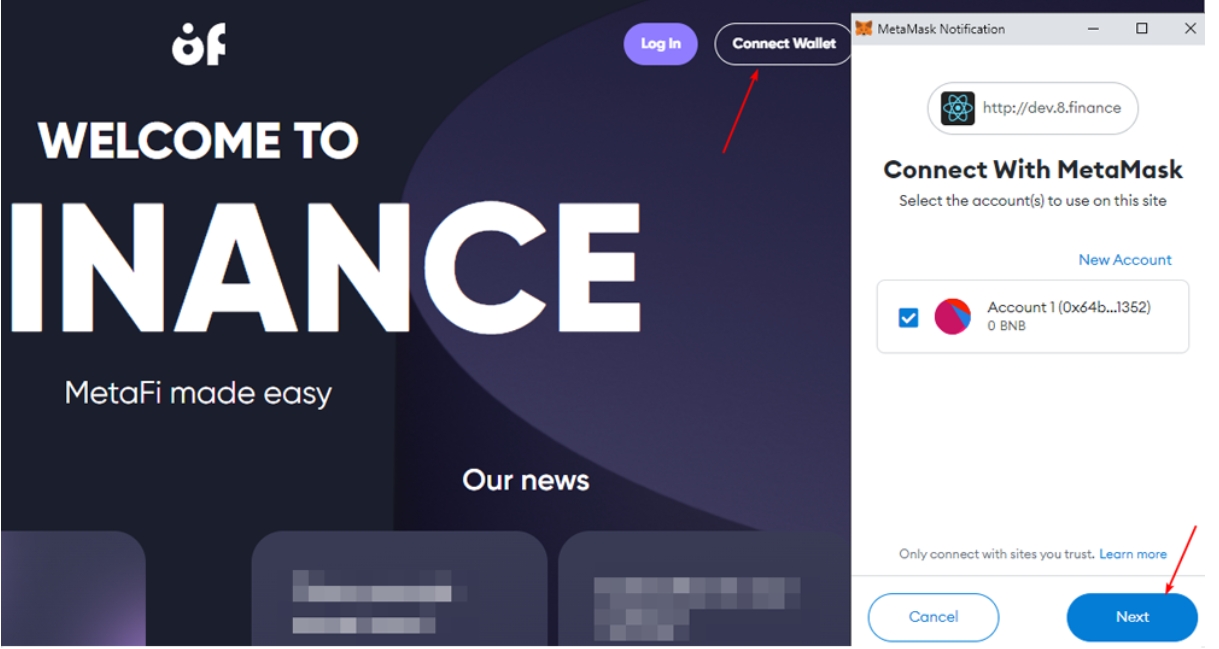
Next, the Metamask extension opens and asks for permission to connect your Wallet to the site.
Click Next and connect.
If you have done everything correctly, you will see a pop-up saying that the site has connected to the Wallet.
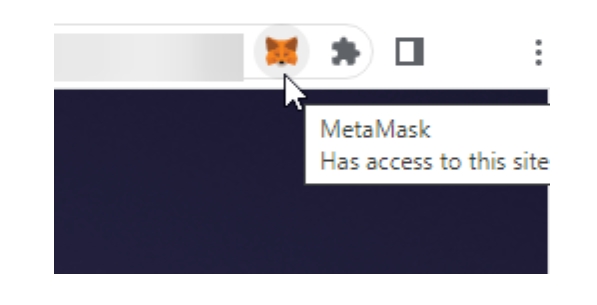
Now you can take full advantage of the services offered by the site.
Last updated

